


This website views at its very best in Firefox web browser, and is not available in a mobile version.
Copyright © All Rights Reserved | Built by Serif Templates


|
With the seabed now painted along with my terrain irregularities we have completed the second step in terrain painting this park. Let’s move on to enhancing the remainder of the base terrain texture. |
||||
|
|
|
|
|
|
|
We’re going to paint some crescent brush strokes keeping our brush loaded with the primary accent terrain texture and loosely following the shape of the hills on the terrain. In this example I’ve set the brush to three tiles in width. You might widen or thin the brush as suits. Most of the shapes painted should be gentle crescent shapes instead of straight lines. Do avoid using this method on the very tops of your hills as it won’t look natural there. |
||||
|
|
|
|
|
|
|
|
||||
|
As seen at the center top of the previous image, the appearance of your off- |
||||
|
|
|
|
|
|
|
If you’ve attempted to do this and you’ve got some places with jagged texture edges instead of one texture blending into another you’ll need to smooth your terrain there with the terrain averager. |
||||
|
|
|
|
|
|
|
What we want next is for the ends of those crescents to fade gradually and to do that they need to be a little more pointed so we’re going to re- |
||||
|
|
|
|
|
|
|
|
||||
|
As you see I’ve made an effort to blend the terrain irregularities I’d already painted, I’ve added a harpoon shape, an S shape, and a random spot. This all helps the overall effect to look more natural. When you’re satisfied with your efforts save your work. |
||||
|
|
|
|
|
|
|
Next we’re going to select a 3x3 brush and load it with the secondary accent texture. I’ll aim to use up to twice as much of the secondary accent texture as I have of the primary accent texture. Brush this texture on both sides of, on one side of, or on the other side of some of the crescents you’ve already painted. This texture may be brushed along your existing crescents, it can be brushed in areas where it’s by itself, and you can choose not to blend this texture with some of the crescents that we’ve done so far; this will add to the randomness and naturalness of our results. While brushing on this texture continue to use crescent or curved shapes. The overall look we’re going for is organic. |
||||
|
|
|
|
|
|
|
Do try to get your curves to blend, complement each other, and to work together. If you’re not sure how to do this it’s best to practice drawing crescents and curves practically with a pencil or charcoal on sketch paper, or if you’re an artist who has experience with physical artists' paints, by brushing washes of color onto a pad, after which you’ll know what results to go for when painting on your park’s terrain. |
||||
|
|
|
|
|
|
|
|
||||
|
Again, avoid painting your secondary accent texture off the park map. |
||||
|
|
|
|
|
|
|
Now we’ve got our secondary accents added it’s time to return to a 2x2 brush, load it with the base terrain texture, and neaten up what we’ve just done, just like we did with the primary accent texture on our first set of crescent shapes. The end result of this is displayed in this next image. |
||||
|
|
|
|
|
|
|
|
||||
|
When considering what to brush next don’t be afraid to alter what you’ve done so far. Free- |
||||
|
|
|
|
|
|
|
Save your park when you’re done with the second terrain accent texture. Let’s come a little more down to earth and take a look around our terrain to see the results of our handiwork. |
||||
|
|
|
|
|
|
|
|
||||
|
|
|
|
|
|
|
|
||||
|
|
||||
|
As you can see the benefits of what we’ve done are more evident now we’re nearer to the terrain and without the blue ghost squares. |
||||
|
|
|
|
|
|
|
Return all your LOD’s to their previous levels when you’re satisfied with the results of your efforts. With your LOD’s restored, as a finishing touch you might like to scan around your park to ensure that there are no trees growing directly out of any rock texture. |
||||
|
|
|
|
|
|
|
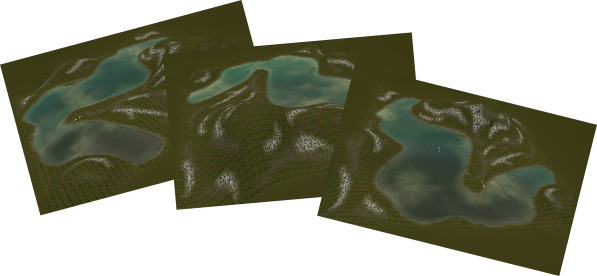
Following are two comparative images. One screenshot shows the result of our efforts with all the terrain painting done while the other shows the park as it was before. |
||||
|
|
|
|
|
|
|
|
||||
|
|
||||
|
|
|
|
|
|
|
|
||||
|
Additional images of how this terrain painting technique enhances this park can be seen in our article My Parks: Hillside On The Lake. |
||||
|
|
|
|
|
|
|
___________________________________________________________ |
||||
|
|
|
|
|
|
|
Free- |
||||
|
|
|
|
|
|
|
To demonstrate the versatility of this technique I’ve illustrated it in another park, this one having a desert theme. After opening a 128x128 sandbox I spent about twenty minutes making the terrain looks as differently as it could from the park we’ve just worked on. The terrain painting took another twenty minutes to do. The brushes were 15x15 dipped into the following textures: |
||||
|
|
|
|
|
|
|
|
||||
|
These are the results. |
||||
|
|
|
|
|
|
|
|
||||
|
Because of the size of this park and the sparingness with which the accent textures were applied this example terrain is a good candidate for one or two additional accent textures. This landscape would look quite delightful with a park built on top of it. Here is a close- |
||||
|
|
|
|
|
|
|
|
||||
|
It took under an hour to get this second park prepared for these screenshots so one need not spend a great deal of time terraforming and creating a new painted terrain. You’ll find that these approaches to terrain painting give the different areas of your park a more defined look and will leave no doubt that your park is located on terrain that was carefully selected and designed by the landscapers on your park design team. |
||||


To view the slider, click on a thumbnail.
To view the album, click on a thumbnail.
| Viewing Full-Sized Images On This Website |
| Effective Park Design: The Best Start For Your Park, Page 2 |
| Master Maps And Guest AI, Page 2 |
| Guest Generation, Park Capacity, And Peep Factory, Page 2 |
| Setting Up And Switching Your Park Entrance, Page 2 |
| Theming Our Stalls & Facilities, Page 2 |
| Our VIP Blue Book, Page 2 |
| Our VIP Blue Book, Page 3 |
| Our VIP Blue Book, Page 4: Spot The VIP's |
| Volitionist's RCT3 Animal Care Guide, Page 2 |
| Volitionist's RCT3 Animal Care Guide, Page 3 |
| Volitionist's RCT3 Animal Care Guide, Page 4 |
| How To Unlock All Campaign Scenarios, Page 2 |
| The Care And Feeding of Custom Downloads, Page 2 |
| The Care And Feeding of Custom Downloads, Page 3 |
| The Care And Feeding of Custom Downloads, Page 4 |
| RCT3 Cheats & Unlockables, Page 2 |
| Options.txt Flags, Page 2 |
| Options.txt Flags, Page 3 |
| RCT3 Keyboard & Mouse Controls: Advanced |
| RCT3 Keyboard & Mouse Controls: Freelook |
| RCT3 Keyboard & Mouse Controls: Isometric |
| RCT3 Keyboard & Mouse Controls: Normal |
| Guests Departing The Station But Not Returning |
| Guests Knocked Over |
| People Spilling Down Stairs |
| Lost Staff |
| ReAppearing Invisible Vendors |
| Park File Thumbnails |
| RCT3 Freezes |
| Earthquakes and Plumbing |
| The Importer |
| SketchUp |
| Reviewing RCT3’s History, Page 2 |
| Chris Sawyer, Page 2 |
| Showcase!: Fall 2020, TNS Pool Paths & TNS Pool Terrain, Page 2 |
| Showcase!: Fall 2020, TNS Pool Paths & TNS Pool Terrain, Page 3 |
| Showcase!: Fall 2020, TNS Pool Paths & TNS Pool Terrain, Page 4 |
| Showcase: Spring 2019 - DasMatze's Fences & Railings, Page 2 |
| Showcase: Spring 2019 - DasMatze's Fences & Railings, Page 3 |
| Showcase: Spring 2019 - DasMatze's Fences & Railings, Page 4 |
| Showcase: Fall 2018 - L-33/Lee, Page 2 |
| Showcase: Fall 2018 - L-33/Lee, Page 3 |
| Showcase: Fall 2018 - L-33/Lee, Page 4 |
| Showcase: Spring 2018 - Spez Mies Wall Set, Page 2 |
| Showcase: Winter 2017 - Mr. Sion's Tiki Bar, Page 2 |
| Showcase: Fall 2017 - Polynesian Panic, Page 2 |
| Hall of Fame: Belgabor's Invisible Doodads |
| Hall of Fame: Spice's Invisible Pool CS |
| Hall of Fame: GTT's Hedge Maze |
| Hall of Fame: GTT's Glas Labyrinth |
| Hall of Fame: Joey's Park CleanUp |
| Hall of Fame: GTT's Hedge Maze, Page 2 |
| My Adventures In SketchUp |
| CSO's I Have Imported |
| TexMod Customized Add-Ins |
| My Parks |
| Videos |
| Screenshots |
| Advertisement Land |
| Intrepid: A Revolution In Design |
| Structure And Ride Supports Set |
| CSO Study: GTT’s Hedge Maze |
| Wonderland Themed Playing Card Railings |
| Architectural Chess |
| Mini Chess |
| Planters 'n' Fountains Set |
| Intrepid: A Revolution In Design, Page 2 |
| Intrepid: A Revolution In Design, Page 3 |
| Intrepid: A Revolution In Design, Page 4 |
| Structure And Ride Supports Set, Page 2 |
| Café, Update 1 |
| Path Add-Ons, Update 1 |
| Planters And Pool Fencing, Page 2 |
| Landscaping And Park Grounds, Page 2 |
| Walls, Tunnels, And Fences, Page 2 |
| Decking, Stairs, And Balustrades Set, Page 2 |
| Decking, Stairs, And Balustrades Set, Page 3 |
| CFR & CTR CSO's, Page 2 |
| CFR & CTR CSO's, Page 3 |
| CFR & CTR CSO's, Update 1, Page 1 |
| CFR & CTR CSO's, Update 1, Page 2 |
| TexMod Tutorial |
| My TexMod Skies |
| TexMod MakeOvers For My Park |
| TexMod MakeOvers For My Park, Page 2 |
| Vanguard West |
| Vanguard West: Financial Report |
| Hillside On The Lake |
| Hillside On The Lake: Financial Summary |
| A Woodland Clearing |
| Vanguard West, Page 2 |
| Vanguard West, Page 3 |
| Vanguard West, Page 4 |
| Vanguard West, Page 5 |
| Vanguard West, Page 6 |
| Vanguard West: Financial Report, Page 2 |
| Vanguard West: Financial Report, Page 3 |
| Hillside On The Lake, Page 2 |
| Hillside On The Lake, Page 3 |
| Hillside On The Lake, Page 4 |
| Hillside On The Lake, Page 5 |
| Hillside On The Lake, Page 6 |
| Hillside On The Lake: Financial Summary, Page 2 |
| Hillside On The Lake: Financial Summary, Page 3 |
| Hillside On The Lake: Financial Summary, Page 4 |
| Hillside On The Lake: Financial Summary, Page 5 |
| A Woodland Clearing, Page 2 |
| Screenshots, Page 2 |
| Screenshots, Page 3 |
| Screenshots, Page 4 |
| Screenshots, Page 5 |
| Advertisement Land, Page 2 |
| Collaborations - Custom Content |
| Collaborations - Parks |
| L-33's POE Building 4 Set |
| RCT2 Wonderland Themed CSO's |
| The Crüe |
| L-33's POE Building 4 Set, Page 2 |
| RCT2 Wonderland Themed CSO's, Page 2 |
| POE Building 4 Set Presentation Park |
| POE Building 4 Set Presentation Park, Page 2 |
| POE Building 4 Set Presentation Park, Page 3 |
| POE Building 4 Set Presentation Park, Page 4 |
| POE Building 4 Set Presentation Park, Page 5 |
| How To Use Park CleanUp, Page 2 |
| How To Use Park CleanUp, Page 3 |
| Park Admission, Ride Pricing, And EI&N, Page 2 |
| Maximizing Your Small Park's Real Estate, Page 2 |
| Park Shuttle Configurations, Page 2 |
| Elevated Coaster Stations And Access Options, Page 2 |
| Suspended Pools And Guest Access Options, Page 2 |
| Terrain Painting - Artistry In Landscaping, Page 2 |
| Terrain Painting - Artistry In Landscaping, Page 3 |
| How To Build A Great Park, Page 2 |
| Optimize Your System And Enhance Your Gaming Experience, Page 2 |
| Custom Scenery |
| TexMod ReTexture Packs |
| Miscellaneous |
| Parks, Scenarios, & Sandboxes |
| Coasters, Rides, & Attractions |
| Structure And Ride Supports - Original Concrete |
| Structure And Ride Supports - Hewn Brick |
| RCT2 Wonderland Themed Set |
| RCT2 Revival Crüe Chess |
| FTA's Invisible Stall With Invisible Vendor |
| RCT3 Launch Screen Slideshow Template |
| Dark Ride Enclosure Toppers |
| Terrain Painting - Artistry In Landscaping, Page 2 |
| Terrain Painting - Artistry In Landscaping, Page 3 |